Monday, January 25, 2016

[Salesforce / Git] Automate metadata backup with SF-Git

If you are a Salesforce nerd like me, I'm sure you have a lot of Developer Edition orgs with you and don't want to loose a line of code.

After months of inactivity the ORG could be freezed and your ORG get lost (or you know personally Marc Benioff and can ask him to revive your username...jk you can open a ticket to ask for the unlock, more details here).

I usually used Git + GitHub (or even Gitlab) to backup the org once the job was done.

The only problem is that I'm a very lazy developer and I wanted a way to automatically do the job with fewer actions as possibile.

That's why I decided to write an automation script in NodeJS running on Heroku, using Git, Salesforce Metadata and a lot of fun!

As usual, for those who are TL;DR, jump to the SF-Git repository and have fun with the Heroku button.

How does the script works?

  1. Logs in your ORG using Username+Password(+Token) flow (this should be a full access user who can see all metadata)
  2. Asks for all metadata (Metadata API)
  3. Retrieves the zipped metadata package files
  4. Clones the remote repository that will host / currently host your backup
  5. Add all files to the git index (deletions included)
  6. Performs a git commit
  7. If the commit has changes, performs a push to the given repository

The script does not include any notification feature in case of error / success.

You can open the run-sf.git file and add your code in the final callback: you could send an email in case of error, write a new row on the app's DB, call another service (why not creating a SF webservice to host these details and create your own console?).

If notification is not mandatory, use this repository as is by clicking on the Heroku button* you find on the README.md file:

Deploy SF-Git as a new Heroku app!

*Heroku free registration required

Before starting create a new git repository (if you wanna keep it secret and don't wanna spend money, use Gitlab, if this is not a problem use GitHub): this repo will store your Org's metadata from now on.

Once you click on the Heroku button you are redirected to the Heroku app configuration page.

You'll be requested for:

  • App Name: the name of your app. This will be the subdomain of your Heroku app (e.g. mydevorg.herokuapp.com)
  • Runtime Selection: which region your servers will be hosted in
  • SF_API_VERSION: APi version used by the metadata engine
  • SF_USERNAME: Salesforce integration username
  • SF_PASSWORD: Salesforce integration password (+token)
  • REPO_URL: url of the previously created git repository (use the form https://username:password@github.com/username/reponame to grant push permission to the repository)
  • REPO_USER_NAME: git author's name (used in the commits)
  • REPO_USER_Email: git author's email (used in the commits)
  • GIT_IGNORE: coma separated lists of files that will be listed in the .gitignore files (e.g. *.xml if you don't want all the xml descriptors)
  • REPO_COMMIT_MESSAGE: this is your default commit message
  • REPO_README: this will be placed in the README.md file
  • EXCLUDE_METADATA: coma separated lists of unwanted metadata objects (e.g. Settings,CustomLabels)

Click the Deploy for free button and after few minutes you'll have your app up and running.

You can see that everything is ok by opening http://yourchoosenappname.herokuapp.com:

{
  status: "SF-Git is Running",
  details: "https://github.com/enreeco/sf-git"
 }

This is a simple webserver that does nothing useful other than saying it is running!

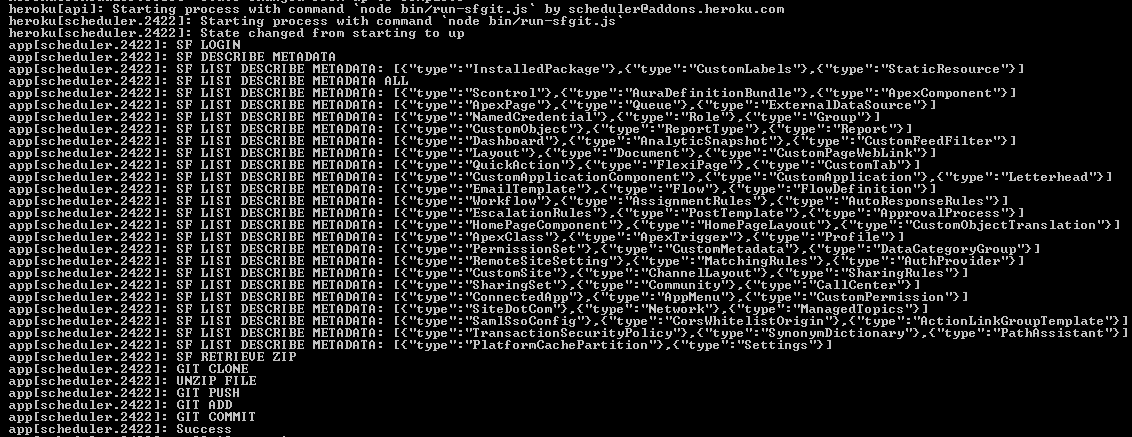
Now you can try the backup script immediately by opening your system console and typing:

$ heroku run bin/sf-git.js


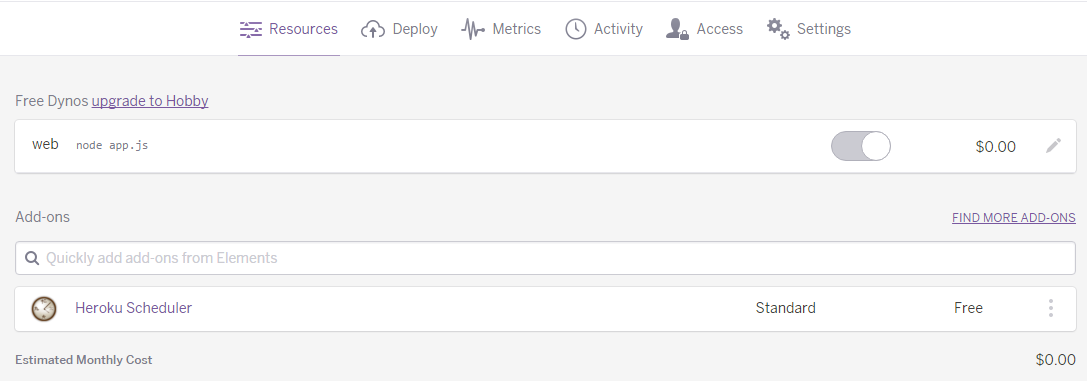
Finally to schedule a script run on a daily basis, open the Resources tab on your newly created Heroku app and on the Add-ons text box type Heroku Scheduler and provision this add-on for free.


Click on the add-on link to setup a new scheduled job:


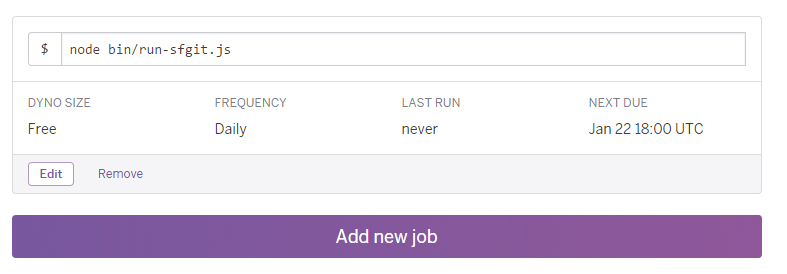
Now your job will be run daily and your Org has safely been backup!

Tuesday, January 12, 2016

[Salesforce / Visualforce] Input Lookup Custom Component

Have you ever needed a VisualForce lookup input field without using a lookup field from another "fake" object?

I did, and now I have an easy to use VisualForce component that does the trick (almost all the trick).

Here is the GitHub repository that contains the component.

The components simply replicates what the standard lookup field does, with 2 important differences:
  • We have to use a custom Apex class to store the ID value (simple data types as String or ID are passed by value rather than reference, so it is impossibile to change the component's parameter value on the fly, see Bob Buzzard post Updating Attributes in Component Controller)
  • If you change the value of the "name" of the lookup field and this matches more than one record, the form submission is canceled and a picklist with all the values is shown (so the user can choose the correct record)

The first class is the ID value container:

public class IDCarrier {
    public IDCarrier(){}
    public IDCarrier(ID value){
        this.value = value;
    }
    public ID value{get;Set;}
}

In your test controller, TestLookupController:
public class TestLookupController {
    public IDCarrier idValue1{get;set;}
 public IDCarrier idValue2{get;set;}
    public TestLookupController(){
        this.idValue1 = new IDCarrier([Select Id From Account Limit 1].Id);
  this.idValue2 = new IDCarrier();
    }
    public void submit(){
  //...
 }
}

You are creating 2 ID fields, one populated with a valid Account Id, the other without any value.

And now in the test page use the component:
<apex:page controller="TestPageController" >
    <apex:form >
        <apex:pageblock>
            <apex:pageBlockButtons location="bottom">
             <apex:commandButton value="SUBMIT" action="{!submit}" />
            </apex:pageBlockButtons>
         <apex:pageblocksection columns="2">
                <apex:pageBlockSectionItem>
                    <apex:outputLabel>Account lookup</apex:outputLabel>
                 <c:inputLookup sobject="Account" value="{!idValue1}"/>
                </apex:pageBlockSectionItem>
                <apex:pageBlockSectionItem>
                    <apex:outputLabel>Selected Account ID:</apex:outputLabel>
                 <apex:outputText value="{!idValue1.value}"/>
                </apex:pageBlockSectionItem>
                
                <apex:pageBlockSectionItem>
                    <apex:outputLabel>Contact lookup</apex:outputLabel>
                 <c:inputLookup sobject="Contact" value="{!idValue2}"/>
                </apex:pageBlockSectionItem>
                <apex:pageBlockSectionItem>
                    <apex:outputLabel>Selected Contact ID:</apex:outputLabel>
                 <apex:outputText value="{!idValue2.value}"/>
                </apex:pageBlockSectionItem>
            </apex:pageblocksection>
        </apex:pageblock>
    </apex:form>
</apex:page>

The component has only 2 parameters:
  • sobject: this is the Sobject API Name (with full prefix name if needed, mandatory)
  • lookup: this is the value field (of type IDCarrier). This is field is not mandatory (in case it is not set, the submit won't set any value)

In the test page we have now 2 input lookup custom components, one of type Account and the other of type Contact:


If you click the "search" button the standard lookup search page appears (it is configurable with the standard object's search layout options).

Once you select a new value for both input lookups and hit the SUBMIT button, the corresponding controller variables idValue1 and idValue2 are correctly updated:


If you type a different name value (without using the lookup window):


Then hit SUBMIT:


The first "%Sale%" Account found is linked to the input lookup component.
If no object is found by the query, the result is simply null (on the IDCarrier.value member).

That's it!