Source: AgentWork
This object represents work item assignment that has been routed to an Agent: this is basically a new type of queue management introduced with Summer 15 called Omni-Channel.
Omni-Channel is a comprehensive customer service solution that lets your call center route any type of incoming work item, including cases, chats, phone calls, or leads—to the most qualified, available agents in your organization.
Omni-Channel integrates seamlessly into the Salesforce console.
This release contains a beta version of Omni-Channel that is production quality but has known limitations (Summer 15).
To enable Omni-Channel go to Customize > Omni-Channel > Settings and flag Enable Omni-Channel.
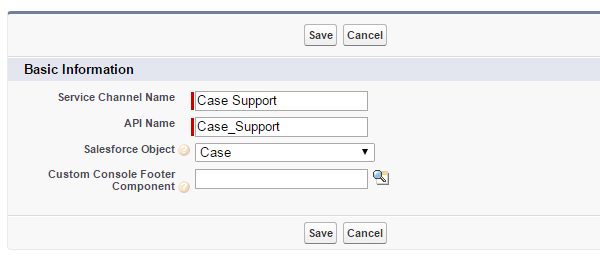
Now let's create a Service Channel: this is the source of work items for the Omni-Channel, and can be associated to various standard objects and even custom object.
These objects are taken from queues and sent to the agent's console in real time.
To create a new Service Channel, click on Customize > Omni-Channel > Service Channels:
The Custom Console Footer Component field is optionally used to open a specific component on the Console when that specific work item is selected.
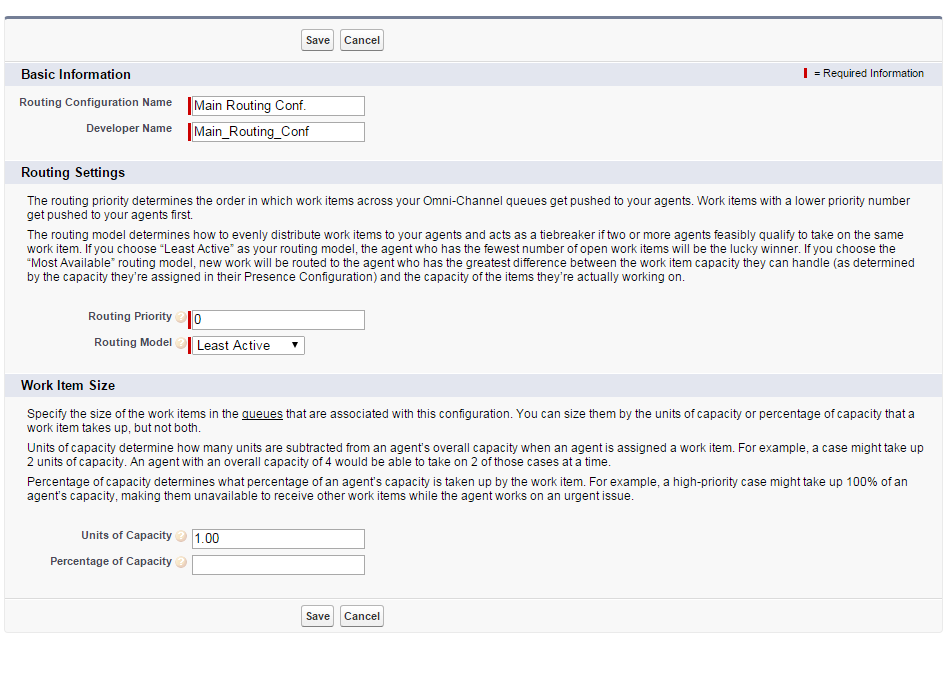
Next step is creating Routing Configurations, which determine how work items are routed to agents; click on Customize > Omni-Channel > Routing Configurations:
Where:
- Routing Priority: is the priority of the current Service Channel. Other factors are counted when calculating the priority (available capacity of the agent, priority of the queue that the work item came from, amount of time that the work item has been waiting in the queue, members of the queue who are available to receive new work items from the queue). When an agent gets a work item, the owner of the object is set to the agent.
- Routing Model: reflects the agent's behavior
- Capacity Weight: amount of agent's capacity (set in the Capacity field of the presence configuration) scaled down when the work item is assigned. You can select a Capacity Weight or a Capacity Percentage, but not both.
- Capacity Percentage: percent of agent's capacity scaled down when the work item is assigned
Now you can link your ORG queues to the Routing Configurations.
Click on Setup > Manage Users > Queues:
In the Routing Configuration set the configuration you have set up in the previous step.
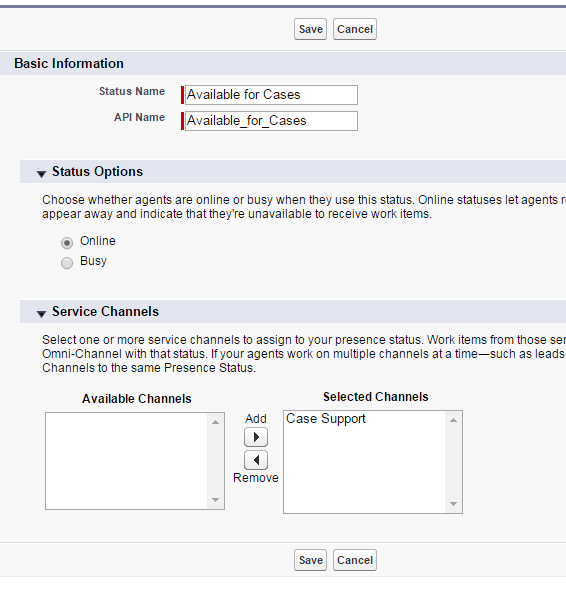
Next step is to configure Agent's presence statuses: this way we can set up how much work every agent can handle.
When you enable the Omni-Channel feature Salesforce adds a Default Presence configuration to be applied to all Agent's by default.
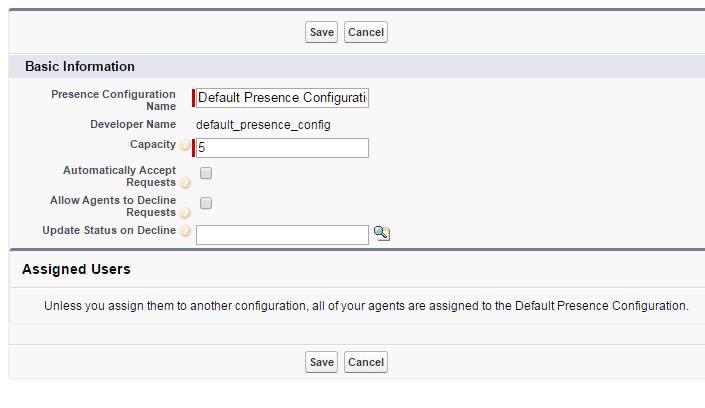
Go to Customize > Omni-Channel > Presence Configurations and click the New:
You can set:
- Capacity: maximum Agent's capacity
- Automatically Accept Requests: automatically assigns a work item to an available agent
- Allow Agents to Decline Requests: Agents can decline assignments; if "Automatically Accept Requests" is set to true, agents cannot decline
- Update Status on Decline: update status when declining, only available if "Allow Agents to Decline Requests" is flagged
select id,lastmodifieddate,CapacityPercentage,CapacityWeight,Name,OriginalQueue.Name,status,WorkItemId,ServiceChannelId,UserId from agentwork order by lastmodifieddate DESC
It shows all the Work Items assigned to the agents (this is basically the history of plyaing with a Case and looping over assigning to a queue and accepting/declining with the current User as Agent).





No comments:
Post a Comment